


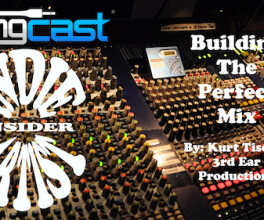


Indie Artist Insider #101
Building The Perfect Mix
by Kurt Tischer of 3rd Ear Productions
![]()
We are expanding our Indie Artist Insider series to include guest blogs from industry professionals and artists from our SongCast family of indie artists.
Check out the first 100 episodes of the Indie Artist Insider at this link.
Here is our first new guest blog, featuring Kurt Tischer of 3rd Ear Productions. It is entitled “Building The Perfect Mix.” Thank you Kurt for sharing your expertise and insight.
Building The Perfect Mix:
I get regular pleas for tips on how to get a great mix, especially in the areas of EQ, Compression, and Gating. While there are many ways to achieve the same or similar results, this is a good opportunity to share some of the things I’ve learned along the way.
EQ: I am a huge proponent of subtractive EQ techniques wherever possible as opposed to additive EQ. For example, with a kick drum, instead of boosting the bottom for punch and the top-mid for snap, pull out the middle frequencies where everything else lives and raise the volume, if necessary. This EQ technique is far less prone to positive phasing problems.
Consider this scenario… If you boost bottom and upper mids in the kick drum, you may find that it starts stomping all over various frequencies of the bass guitar, so you boost those frequencies on the bass that have been affected by what you did with the kick. Then you notice the bass guitar is now covering up the “chunkiness” of the electric guitar, so you end up boosting the frequencies on the guitar that have been hidden by what you did with the bass.
Whatever the source and frequency range, that approach can become a never ending cycle of boost. On the other hand, with subtractive EQ, you are more-or-less “carving out space” within the frequency spectrum for everything to sit and live happily-ever-after, rather than forcing something over the top of something else.
Keep in mind the frequency and power range of each instrument or vocal you are dealing with and EQ accordingly.
The key that the song is in also plays a part in how to choose your EQ settings. Keep a chart handy of the relative frequencies of each musical note between say 40Hz and 12kHz, as well as the relevant frequency ranges of each instrument.
In these days of digital automation, sometimes it makes more sense to select a certain center frequency and bandwidth, then raise that portion of a signal. For example, when that shredding guitar solo comes at you, instead of actually raising the overall volume of the channel, find the center frequency band where that solo starts and raise that a bit, then move the frequency band up or down as the solo progresses, then return the EQ to its original settings when the solo is over.
Take out some of the 100Hz-300Hz from the bass with a medium-tight Q (3.3 to 7) depending on the source. Same thing with really wound-up, chunky electric guitars. But if the guitarist has a decent sound, you shouldn’t take out too much above say 250Hz.
If you have several guitar tracks (for example) that are basically the same sound and you are trying to “carve out” pockets for vocals or keyboards, pick slightly different center frequencies for each track when you cut.
Vocals sometimes get muddy from about 250Hz to about 330Hz. Vocals and electric guitars also tend to get harsh from 2kHz to about 5kHz. The harsh stuff is not only unpleasant, but at high enough volumes, actually hurts and can do lasting damage to one’s hearing.
You may want to roll off just about anything below say 35-40Hz except for bass and drums. Most systems will be incapable of reproducing frequencies below 35-40Hz very well, and the ones that are will more than likely be the big pro audio sound reinforcement systems.
You might want to do the same with certain sources that are incapable of producing high frequencies above say 16kHz, such as the bass and drums, with the exception of cymbals or overhead mics.
The point here is to find offending frequencies or frequency bands and back them out a little, then raise the volume, if necessary. And again, “carve out space” for your arrangement to live within the frequency spectrum.
Compression: One thing you’ll need to learn is what actually needs compression and what doesn’t. This just comes with experience in working with lots of material over time. Some players, some instruments, some genres just don’t need it, though I do know that even classical music recordings get some compression applied at times. Orchestras do have incredible dynamic range and sometimes it needs to be tamed for recording, mastering, and broadcast purposes. That said, at tracking time, if something needs compression, I tend to go for fast attack/decay, but low ratio (2:1) with the threshold set so it just trips as the input signal starts to exceed unity (meters dipping into the yellow). I barely want to know it is there.
At mixdown I may tighten the wrench a bit harder. Drums and Bass – Short Attack and Decay. Shortest settings possible. Threshold between -7 and -20dB depending on the player and the material. Ratio in the area of about 4:1. Watch the compression meter for the average amount of gain reduction being applied and raise the gain on the compressor by that amount, if necessary. Depending on the material you may want to use longer attack and decay times on the bass, say in the area of between 10-50ms attack and 100+ for decay. It all depends on the source.
Again, knowing when and what to compress is key. Sometimes you just don’t need it. I rarely compress hot and dirty guitars at all. If I do it is only very subtle, 2:1 compression of the highest peaks, just to eliminate clipping of the output. Anything more could cause the compression to become visible on the track (breathing, pumping, etc.) and more often than not, it can work against the overall rhythm and feel of the song. With vocals I tend to go between 2:1 and 4:1 with longer attack and decay times (10-50ms attack and 100+ decay).
The point with compression is to get everything to play nicely together in terms of their average volume levels so you don’t have to ride your faders all the time. I won’t get into things like key inputs and side-chaining, since that is a bit more advanced, but if you want to check some of that out, maybe have a look at Rick Beato’s interview with Chris Lord -Alge on YouTube.
Gates: Almost never at tracking time. Regardless of what I’m doing, gating the snare is almost always a no-no. Drummers sometimes do little ghost notes on the snare. Any amount of gating on the snare can kill any swing or other “feel” that may be coming from a drummer’s ghost notes.
I tend to gate the kick drum as fast and tight as necessary. But since toms are more musical and tend to ring a little, you may not want the gate to close fast or to close completely. I sometimes leave the gate open at about -40 to – 60dB when there’s no input signal above the threshold level. In this way, the
gate allows some small amount of signal to pass through after it falls below the set threshold, just above the noise floor of the source. If your gate allows for that, give it a try and see how it works for you.
Sometimes I will gate electric guitars or other electronic instruments if there is hiss, buzz, hum, or some other gremlin poking its head out above other decaying material, but that is a kind of “fix it in the mix” approach that should be avoided, if at all possible. If there’s hum or buzz, it is better to solve those problems as much as possible before any recording takes place. Most often, hum or buzz will be coming from guitars interacting with the amp and things like fluorescent lighting. Move around and see if you can get the noise to quiet down, then mark or note those positions for recording.
Gating in the studio is a totally different animal than gating for live sound. Usually, in live sound we gate to clean up the mix by cutting down bleed between adjacent mics, but in the studio, depending on how it was tracked, you may actually need that bleed from adjacent mics since they help to capture the sound of the room or some aspect of an acoustic instrument, especially drums and decaying cymbals.
So, what is the “perfect” mix or the “right” mix? Well, there isn’t one, really. While there are certain parameters you’ll want to stay within when building a mix for mastering and distribution, when it comes to the individual elements, a lot of it is subjective. My idea of how a particular song should be mixed is almost certain to be different from someone else.
As always, use your ears. These are just guidelines and tricks I’ve learned and used, not rules. You know what they say about rules.
Visit Kurt’s 3rd Ear Productions website and like their Facebook page.
Comments
No comment