


 First off, a short primer on some Facebook basics that are still confusing to many: what’s a Facebook Profile compared to a Facebook Page? A profile is your personal account, for individuals only; a page is for businesses and groups, including musicians and bands. On a page, you don’t have “friends,” you have “likes” and the page is viewable by the public. On March 30th, 2012, all Facebook Pages were switched to the new Timeline format, while those with profiles could opt in or not. This is why you sometimes still see the old format on individual profiles, usually people who don’t spend a lot of time on Facebook.
For many, Timeline was yet another a maddeningly frustrating change made by the company. Musicians and bands had no choice and were forced to live with the change. And many of them still haven’t updated their pages, nor do they utilize all the new features available to help spiff it up.
Cover Photo
If you haven’t added a Cover Photo — a giant photo next to and behind your thumbnail profile pic — visitors see a big, blank nothing at the top of your page when they land on it. Click the “Add Cover” button in this area to select and add a cover photo. Keep in mind that the photo will be enlarged when it goes on your page, so pick one with high resolution and nice detail, something that looks colorful and dazzling.
A Tagline
Below the cover photo and to the left, underneath your profile pic, you’ll see an “Add Information About…” link. Click this and add a short, descriptive tagline about you or your band in 155 characters or less.
Adding Milestones
Being able to add the milestones of your career to your page is one of the reasons Timeline was created. When a fan looks at your page they want to know your history, not just what’s happening now. Timeline allows an easy way to scroll through chronologically. Milestones show up as a big box spreading across the entire page. Adding a milestone is an eye catching way to make fans stop to check out what happened when, be it the band’s founding, the first big gig, and so on. To add a milestone, go to the status bar and click on the “Event/Milestone” tab. A scroll down menu will appear. click “Milestone” and add the info. Tell the story of your milestone and don’t forget to add a related photo to make it stand out more.
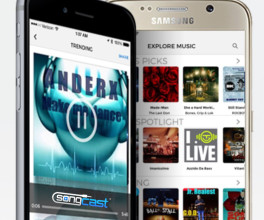
That “Event/Milestone” tab has other features worth exploring, such as a questionnaire, so you can create a fun poll for your fans, and a tab for adding your music directly to your Timeline if it already exists in an online library like Spotify.
Tip: A lot of people don’t like having to manage two different types of pages, so they use their individual profile as their music page. If you would like to convert your personal account to a music page, go to the Help Center and search for “Converting Your Personal Account to a Facebook Page” in the “Explore Popular Features” section for info on how to do this.
If you do have both types of pages, check out Facebook’s new “Voice” tab at the extreme upper right, which allows page admins to engage on their page as themselves.
Comments
No comment